
Learn how to create and edit a new document with FormSwift
First, how would you like to create your new document?
A. By Choosing & Filling Out One of FormSwift's Templates (ex. below)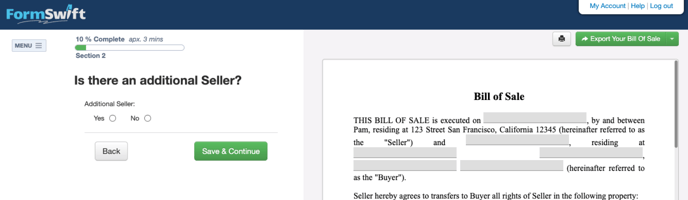
or
B. By Using a Document I Upload Myself (ex. below, see section B in this guide)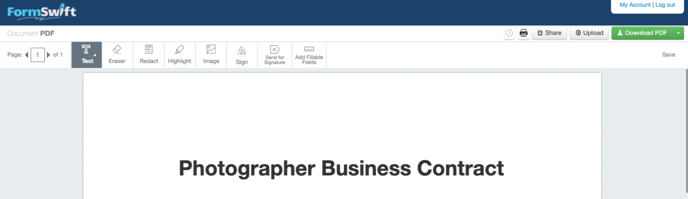
A. Creating a New Document from a Template
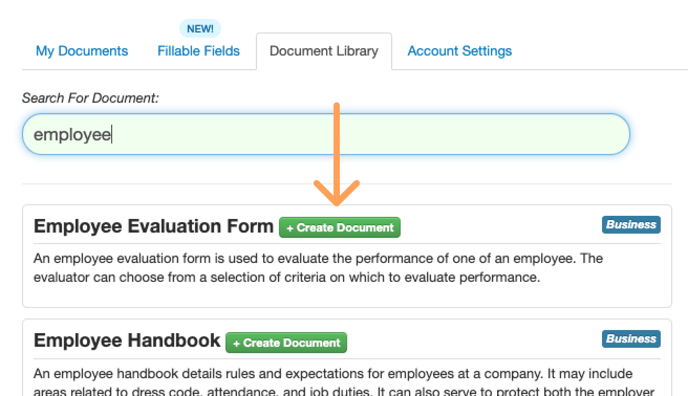
- Go to the Document Library, make sure you are signed in to your FormSwift account
- If you know the type of document you are looking for, use the search bar and enter a related term (e.g. 'employee')
Alternatively, you can browse through the top of the list which features some of FormSwift's most popular documents - Click on the 'Create Document' button next to the document you want to create
- After successfully creating a new document, you are all set to begin editing your document! Please see additional instructions below on how to fill out your document
Fill Out a New Template
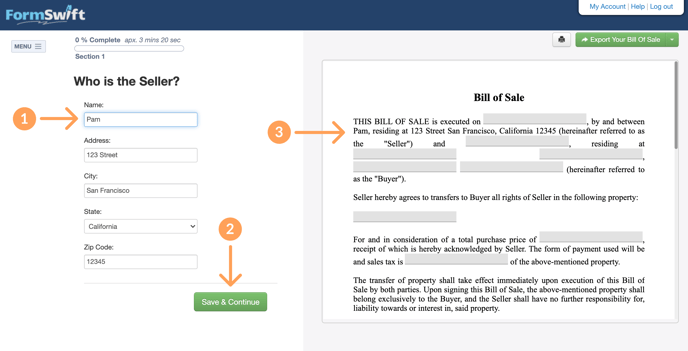
- Click on the empty fields and type your answers
- Click the green 'Save & Continue' button
- Your answers will automatically fill into the document preview (righthand side)
- Repeat steps 1-2 until completion
B. Creating a New Document from an Upload
- Log into your FormSwift account
- Go to your My Documents tab and click the green 'Select a Document to Upload' button (you may need to scroll down)
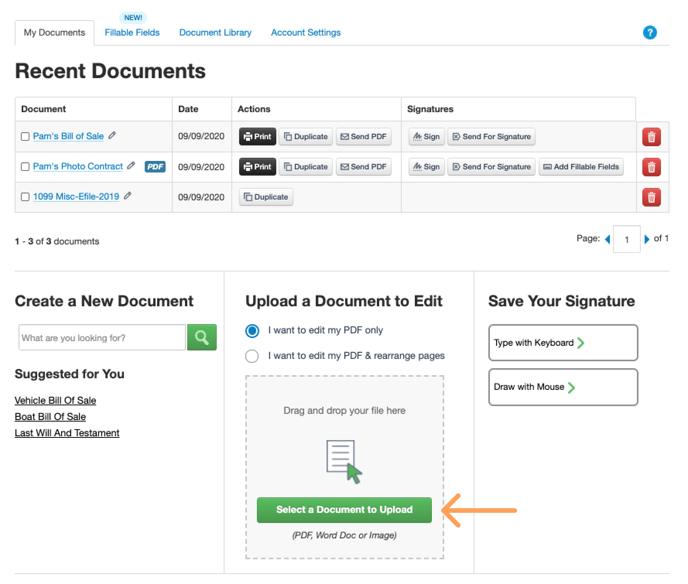
- A window will pop up asking which file you would like to upload, after making the desired selection it will open your document with FormSwift's PDF editor
- Please note that only PDF, Word, or image files will work as an upload
- Alternatively, you may also visit formswift.com/edit-pdf and click the "Select Files to Edit" button to upload a file to FormSwift
Fill Out Your Uploaded Document
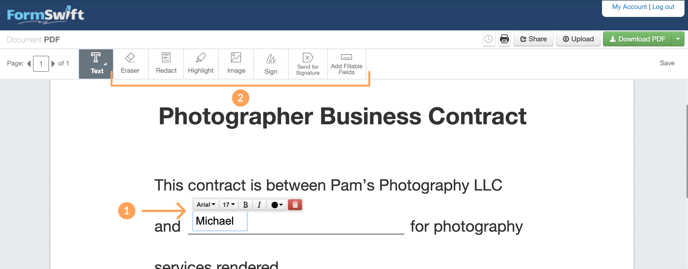
- You can click anywhere on your document to add text (the "Text Tool" is selected by default)
- To use the Text Tool:
- Click on the "Text" tile in the toolbar, or simply click on the page you would like to add text
- Type the text you'd like to add
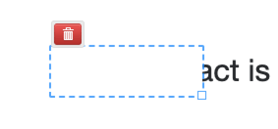
- Click and drag the text box to move it into the desired position
- You can use the following tools to edit the text styling:
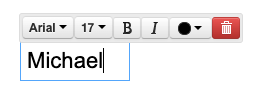
- Click on "Arial" to choose a different font
- Click on "17" to adjust font size
- Click on "B" to Bold the text
- Click on "I" to Italicize the text
- Click on the circle icon to change the color of the text
- Click on the trash icon to delete the text
- To use the Text Tool:
- Other useful tools include Eraser, Redact, Highlight, Image, Sign etc.
- To use the Eraser:
- Click on the "Eraser" tool in the toolbar
- Click near the text you'd like to erase
- Click and drag on the desired section to create an eraser box
- After placing the erased section, you can resize it by clicking and dragging the bottom right corner of the eraser box
- To use the Sign tool, see the guide:
How do I sign a document? - To Send for Signature, see the guide:
How do I request someone else to sign my document?
- To use the Eraser: